Skip to content


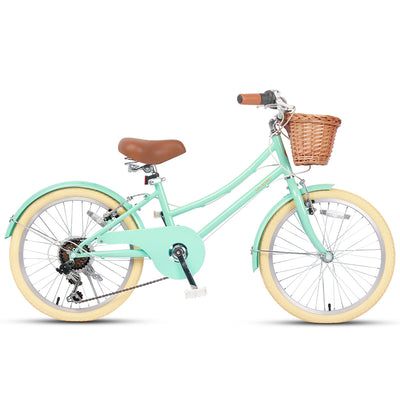


Table of Contents
Teaching your child to ride a bike is all about mastering balance before pedaling. In fact, it takes fewer than three practice sessions to get them rolling on their own. This guide covers the best age for kids to start, the essential gear you will need, and five simple, proven steps used by American families to make this milestone easy and fun for everyone.
When Is the Right Age to Start?
Many parents ask the same question: What is the best age for a child to learn to ride a bike? There is no single perfect number. It mostly depends on your child's coordination and interest.
According to a 2025 study published by the National Center for Biotechnology Information (NCBI), a controlled trial of 50 children showed that kids who started on balance bikes learned to ride independently at an average age of 4.16 years old. Meanwhile, kids who used training wheels took until 5.97 years old to learn. That is a difference of nearly two years. This key data point shows that choosing the right approach matters more than just waiting for your child to grow older.
The chart below will help you quickly figure out which stage your child is in currently:
|
Age Group |
Recommended Bike |
Key Focus |
|
2 – 4 years |
12 inch bike |
Gliding with feet off the ground |
|
3 – 5 years |
14 inch bike |
Coordinating pedaling and braking |
|
4 – 8 years |
16 inch bike |
Independent riding and steering |
|
5 – 10 years |
18 inch bike |
Confident turning and stopping |
|
6 – 13 years |
20 inch bike |
Riding uphill and downhill, using hand brakes |
|
8 years and up |
24 inch bike |
Changing gears and longer rides |
|
12 years and up |
26 inch bike |
Advanced handling and road awareness |
If your child can walk steadily and climb onto the couch on their own, they have the basic skills to start using a balance bike. There is no need to wait for a specific standard age. Every child develops at their own pace.


What You'll Need Before You Begin
Before your first practice session, preparation directly determines how quickly your child will learn. Three things matter most: the right bike, the necessary safety gear, and a suitable practice spot. Let us look at each item one by one.
Picking the Right Bike Size
Many parents make the common mistake of buying a bike that is one size too big, thinking their child will grow into it. This approach actually hurts the learning process. If the frame is too large, your child cannot touch the ground with their feet. They will not be able to catch themselves when they lose balance, which quickly leads to fear.
The correct size is simple: when your child sits on the saddle, both feet must rest completely flat on the ground with a slight bend in the knees rather than being fully straight.
Use this height chart to choose the right fit:
|
Child's Height |
Inseam |
Recommended Wheel Size |
|
86 – 100 cm (34 – 39 in) |
30 – 38 cm (12 – 15 in) |
12 inch bike |
|
95 – 110 cm (37 – 43 in) |
36 – 45 cm (14 – 18 in) |
14 inch bike |
|
105 – 120 cm (41 – 47 in) |
44 – 52 cm (17 – 20 in) |
16 inch bike |
|
115 – 130 cm (45 – 51 in) |
50 – 58 cm (20 – 23 in) |
18 inch bike |
|
125 – 145 cm (49 – 57 in) |
58 – 68 cm (23 – 27 in) |
20 inch bike |
|
140 – 160 cm (55 – 63 in) |
65 – 76 cm (26 – 30 in) |
24 inch bike |
|
Over 155 cm (Over 61 in) |
Over 72 cm (Over 28 in) |
26 inch bike |
For younger children who are just starting out, we recommend the Glerc 12-inch bike series. The total weight is just 21 pounds (9.5 kg), and the seat height adjusts easily between 47 and 55 centimeters (18.5 to 21.7 inches). Equipped with pneumatic rubber tires, it rides much smoother than toy bikes with plastic wheels. The woven wicker basket on the vintage model is also very popular with little kids, as it can hold their toys and treasures.

Safety Gear That Actually Matters
You do not need to buy a ton of safety gear. Only three things actually keep your child safe.
A well-fitting helmet is the absolute baseline. The standard check is that the edge of the helmet should sit about two fingers wide above the eyebrows, and the chin strap should be buckled securely without being too tight. A pair of closed-toe sneakers is enough. Sandals and flip-flops are absolutely out because toes can easily get caught in the chain. Knee and elbow pads are optional, but they are very useful during the early stages when falls happen more often.
As for professional cycling gloves and padded bike shorts, young children do not need them at all. These extras will only feel like too much hassle and make them not want to wear any gear.
Choosing a Good Practice Spot
Your choice of practice spot decides whether your child's first experience is fun or frustrating. The ideal area is flat, smooth, and free of traffic. Grass hurts less when falling, but it creates too much rolling resistance. Asphalt offers a smooth ride, but falls can cause scrapes. The smartest choice is a hard, flat surface with a very slight slope, such as an empty parking lot or a quiet neighborhood driveway.
How to Ride a Bike in 5 Easy Steps
Forget the old method from your childhood where a parent holds the back of the seat and suddenly lets go. That approach is ineffective and easily leads to crashes and a fear of riding. Below is the most efficient, widely proven method used today.
Step 1: Get Comfortable with Balance
Lower the seat until your child can sit on it with both feet flat on the ground. Let them push the bike forward just like walking, controlling the speed themselves. This step looks very simple, but it is actually the foundation of the whole learning process because they need to get used to the feeling of being on two wheels.
Some kids clear this stage in 10 minutes, while others might need a whole week. Do not rush them, and let them decide when they are ready to move to the next step.
Step 2: Practice Gliding with Feet Off the Ground
Once your child can steadily move the bike with their feet, encourage them to push off hard and lift their feet to glide. Aim for 1 second, then 3 seconds, then 5 seconds. This step is the most critical part of the entire learning process.
The essence of riding a bike is balance, and pedaling is just a way to keep that balance going. When your child can glide continuously for 10 seconds without touching the ground, they basically know how to ride.
Step 3: Learn to Start and Stop
Many parents skip the braking step, so their child cannot stop once they get moving. They hit something, get scared, and refuse to ride again. Teach them how to stop before teaching them how to ride.
If your child uses a balance bike, braking means dragging their feet on the ground. If they use a pedal bike, like the Glerc 14-inch BMX Style Kids Bike Starry, it comes with a coaster brake. Your child only needs to pedal backward to stop. This design is much easier on little hands because children under five years old lack the hand strength to squeeze a hand brake.
Practice this repeatedly on flat ground: ride, stop, ride, stop. Turn it into a game like Red Light Green Light, and your child will have a blast.
Step 4: Add the Pedals
At this stage, if they used a balance bike before, you can now switch to a pedal bike. If you started with a pedal bike and removed the pedals to use it as a balance bike for a while, put the pedals back on now.
Have your child sit on the saddle with one foot on the ground and the other foot on the pedal at the 2 o'clock position. Tell them to push down hard on that pedal while pushing off the ground with their other foot to start. Parents should not hold the seat or handlebars. Instead, hold your child's shoulders or the back of their shirt. The moment you hold the bike, your child will rely on your support and will never learn to balance on their own.
Step 5: Practice Steering and Turning
Once your child can ride in a straight line, use sidewalk chalk to draw circles on the ground or set up water bottles in a wide arc for them to weave through. Share a very important tip with them: look where you want to go, and the bike will naturally follow.
There is no rush to teach advanced skills like sharp turns or sudden stops. Let your child enjoy the simple thrill of riding first.
Common Mistakes to Avoid
We have compiled the most common mistakes parents make when teaching their kids to ride a bike so you can avoid them:
- The first mistake is holding the seat the entire time. This action makes your child rely completely on your support, which stops them from learning how to balance. The correct approach is to hold their shoulders or the back of their shirt, giving them a chance to feel the wobble of the bike themselves.
- The second mistake is buying a bike that is one size too big. A heavy, oversized bike will destroy your child's confidence on day one. It is better to upgrade to a bigger bike next year than to force them to learn through fear.
- The third mistake is practicing at the wrong time. If your child is tired, hungry, or just got scolded, it is not the right time to practice. Choose a moment when they are well-rested and in a stable mood.
- The fourth mistake is comparing them to siblings or other kids. Every child progresses at a different pace. Some get it in one afternoon, while others are still falling after a month. Comparisons only crush their confidence.
- The final mistake is recording the whole session on your phone. Pointing a camera at your child makes them nervous, overly eager to show off, and prone to losing their form. Put down your phone and focus on supporting them.
- How to Keep Your Child Motivated
The psychological aspect of learning to ride a bike is harder than the physical side. Your child will fall, get scared, cry, and suddenly want to quit. Your guidance during these moments is absolutely crucial.
Keep each practice session under 15 to 20 minutes, which is especially important for younger kids. End the session on a high note rather than waiting for a total meltdown, so they look forward to the next time. Prepare small rewards like a sticker, a popsicle, or a juice box, which are more direct and effective than verbal praise alone.
Track your child's small milestones, such as gliding for 5 seconds today and 8 seconds tomorrow. Letting your child see and feel their own progress is the best source of motivation.
Quick Tips for Parents
Here is a quick summary of simple, practical tips to help you avoid common mistakes:
|
Stage |
Key Focus |
Time Investment |
|
Preparation |
Choose the right size, get all safety gear |
1 day |
|
Balance Practice |
Walking the bike → Gliding |
1 to 2 weeks |
|
Pedaling on the Road |
Starting → Straight-line riding |
3 to 5 practice sessions |
|
Advanced Skills |
Turning → Coordinating brakes |
2 to 3 weeks |
Pick a weekend morning for practice time because it is cool, less crowded, and your child will have plenty of energy. Have them wear long sleeves and pants for the first few sessions to prevent scrapes if they fall. At the end of each practice session, let your child push the bike back home on their own. This is a key step to help them build a sense of ownership over their bike.
Final Thoughts
Teaching your child to ride a bike may look like a physical skill, but it is actually their first real taste of freedom and independence. The right bike, the correct method, and plenty of patience are all you need to help them make this milestone leap.
Glerc focuses on designing safe, easy-to-ride, and great-looking bikes for children, covering all sizes including 12, 14, 16, 18, 20, 24, and 26 inches. No matter how old your child is, you can find the perfect model for their age and height at Glerc.
Give your child the right bike, and they will pave the rest of the way themselves.
FAQ
How long does it usually take for a child to learn to ride a bike?
Most children who use the right method need 5 to 10 practice sessions to ride independently. Each session should last 15 to 20 minutes. Kids who start with a balance bike usually learn faster.
Which is safer, a balance bike or training wheels?
A balance bike is safer. Your child can put both feet on the ground at any time, which lowers the chance of falling. Training wheels can tip over on slopes or during turns, making it harder to regain balance.
Do I really need to buy a specific kids bike?
Can they just use a small adult bike? You must buy a properly sized kids bike. Small adult bikes are wrong for children in terms of weight, handlebar width, and brake leverage. Using one will slow down their progress and can even cause wrist injuries.
When should my child upgrade to a bigger bike?
It is time for a larger bike when your child sits on the saddle and has too much extra clearance with flat feet, or when their knees hit the handlebars while pedaling. Generally, kids switch sizes every two years.
Is a helmet absolutely necessary when learning to ride?
Yes, it is mandatory. Data from the CDC shows that wearing a helmet correctly reduces the risk of head injuries in children by about 60%. This is a non-negotiable rule.


GLERC creates stylish, durable kids bikes designed to help families ride together with confidence. From sizing guidance to assembly support, our team shares practical advice to make every ride safer and more fun.